Hey everyone!
Today I am going to be talking about how to set up a brooder for your baby chicks. Getting baby chicks is such an exciting time. If you’ve never raised baby chicks before, you’ve come to the right place! I remember when I first heard the word, “brooder”. I remember pretending to know what that was when in actuality, I had no idea! Ha Ha! A “brooder” is just a fancy word for a place to keep your baby chicks until they’re big enough for a coop.
There are 4 basic things your baby chicks will need to survive and thrive in their first weeks of life. If you’re like me, life is busy, and you maybe don’t want one more thing to take care of. But trust me! Raising chickens is so easy and so worth it! I’m a mother of 3 kids, a wife of a pastor, and raising our chickens is almost therapy for me.
Let’s talk about brooder set up, so you can be sure to get off to a great start! We also have a video that walks you through this process.
The 4 basic needs for your brooder are as follows:
# 1: Environment
You will need something to contain your baby chicks. Some people will use a large tote, kiddie pool, a tub, or even a cardboard box. It doesn’t need to be fancy! Trust me, I went with the inexpensive route and bought cardboard panels off the internet. They were so easy to put together and then I could decide how large of a brooder I wanted! I put together 8 panels and bam! Done.
Next, I laid down puppy pads. These are so great! You want to make sure that the ground surface is not slippery, or your sweet chicks may get splayed-leg, or deformed feet…an invitation to be picked on by the other chicks. Puppy pads are non-slip and make for easy clean up.
My third step was to lay down pine shavings. Pine shavings are safe for chickens. You will want to avoid cedar shavings as these contain oils that can be harmful for your chicks’ respiratory systems.
Finally, I sprinkled Coop Recuperate™ over the pine shavings and let me tell you, it’s a coop saver! Coop Recuperate™ will help keep your brooder dry and fresh. It lengthens the life of your bedding and contains diatomaceous earth which is a natural fly repellant. Score! Honestly, it smells amazing and contains things that help keep your chicks healthy and happy. It’s a win for everyone!
Tips From Annie
• You want your brooder to be free from drafts, predators and extreme weather changes
• 2 sq. ft. of space per chick
• Proper ventilation
• Non slip surface (no newspaper or cardboard)
• 1 inch of pine shavings
• Clean and dry environment allows for healthy chicks to thrive
# 2: Heat
The second thing to consider is a heat source. If you’ve done any research at all about this you know that heat lamps are probably the most economical option. However, heat lamps have a bad reputation. Many chickens and other livestock have lost their lives due to fires caused by heat lamps. Knowing this, we chose to go with a radiant heat panel. It’s a safe alternative to a heat lamp. They have many options to choose from. But, can I be honest with you? When our chicks came, we found the heat panel was too small for our chicks. They needed a little bit more heat. So, we did add a heat lamp to their brooder and checked it often. They were much happier with a little more heat! I think if we maybe would have purchased two panels though, it might have been sufficient. Just do what you and your chicks are most comfortable with.
Tips From Annie
• Baby chicks need to stay warm! The brooder temp should be 95 degrees the first week of life.
• Each week you can lower the temperature by 5 degrees until you reach a brooder temp of 75 degrees.
• If you go with a heat lamp, make sure you use a RED bulb. Baby chicks need their sleep and red lamps allow for this.
• If you go with a heat panel, you will need to provide a small light source so the chicks can find their food and water. They cannot see in the dark!
• If your chicks are huddled together, they need more heat.
• If your chicks are moving away from the heat source they are too hot.
• If your chicks are spread out and seem happy and content, the temp is just right.
# 3: Feed
The third item you need is feed. I went to our local farm supply store and was almost overwhelmed by all the different options for food and water dispensers. I bought simple, chick-sized feeders. I know it’s tempting to just go to the big ones, but your baby chicks likely won’t be able to reach those! So, just go ahead and buy the chick-sized ones to start. You won’t regret it. Then, we got non-medicated chick starter feed. We chose non-medicated because we like a more natural approach. Most importantly, we were sure to put First Peep™ into our chick’s food! The girls loved it and it has organic essential oils, kelp, and probiotics to get your chicks digestive health off to a great start.
Tips From Annie
• You will need to check your feeders’ multiple times a day.
• Chicks eat a lot and are messy! Make sure your feeders are full and clean.
• Use First Peep™ for a strong growth and development foundation.
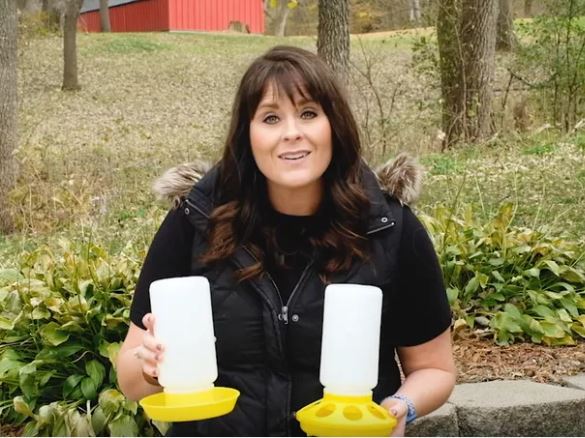
# 4: Water
The final item you need for your brooder is water. It is so important to get your chicks eating and drinking when they first arrive. Chicks are small and don’t have much to them, so they eat and drink (and poop!) a lot. Clean, fresh water is vital to your chicks’ health. I used a chick-size waterer. I have read that some people choose to use a bowl from their cupboard. But guess what? Baby chicks cannot swim. Many sweet little chicks have drowned in a bowl of water. With that said, there are other options for water. There are chick nipple waterers as well. These are nice because the chickens can’t kick their pine shavings, food, or poop into their waterer. If you choose a simple waterer to get started (I did!), just make sure you check it often. It’s not hard and then you get to spend more time with your little peeps! I mixed up a gallon of Chick E-lixir™ for my girls and they “flocked” to it. Ha! Seriously though, Chick E-lixir™ contains awesome things including electrolytes to keep your chicks hydrated. Dehydration can be extremely dangerous to chicks. I was amazed at how much water my 10 little chicks drank!
Tips From Annie
• Clean, fresh water is an absolute must! Check your water often.
• NO bowls of water. Chicks can’t swim!
• Chick E-lixir™ is yummy and a great way to aid in your chicks’ growth and development. And, it’s EASY to mix-up!
That’s it! I know this seems like a lot of information, but when I first started, I wanted to know how to get my chicks off to their best start! Raising chickens is one of my most favorite hobbies and I’m sure it will quickly become one of yours as well! Happy chickening!