Hatching your own eggs at home is a really fun way to add to your flock. You’ll want fertilized eggs to hatch. You can either get these from your existing flock or you can purchase fertilized eggs from another farm. The process of incubation can take place either artificially with an incubator, or with a broody hen. We’re going to discuss the timeline of developing eggs and how you can manage them if you’re incubating them artificially.
Chick Development
It takes chicken eggs 21 days to hatch. There’s a lot that goes on in those short 21 days! When you’re hatching eggs in an incubator, you’re taking the place of the mother hen. You’ll need to make sure that your incubator is keeping the temperature between 100-102 degrees Fahrenheit. Even a half degree change can affect the chick’s development and slow hatching by up to five and a half hours. The humidity should remain between 60-65% for the first 17 days of incubation, then increase to 70% for the last 3-4 days before hatching.
Another critical factor of hatching eggs successfully is turning the eggs at least three times per day. Your incubator may do this automatically. If it doesn’t, you’ll need to do this by hand. Turn the eggs at least three times per day during the first 17 days of incubation. This helps to prevent the chick from developing and sticking to the side of the shell. The egg yolk will naturally float up within the shell. Turning the egg frequently helps to ensure that the chick doesn’t get stuck on one side of the egg.
Incubator Timeline
Here’s what you’ll need to do during the incubation period:
Day 0: The day before you place your eggs into the incubator, you’ll want to go ahead and set your incubator up. Set the temperature and humidity to test it out before you put eggs in it. It should be set before the eggs go in.
Day 1: Place clean, fertilized eggs into the prepared incubator. This is often called ‘setting’ the eggs.
Days 1-18: Turn the eggs at least three times per day if your incubator doesn’t do this automatically. Use a pencil (NOT a pen) to mark side of the egg so that you can keep up with whether they have been turned or not. Continue to monitor the temperature and humidity closely and adjust as necessary.
Day 7-10: At some point during this time, you’ll need to candle your eggs. This means taking a bright flashlight or candling light and holding it up to your eggs to check for viability. Not all eggs will hatch. Removing unfertile or dead embryos from the incubator will help keep the incubator clean and sanitary for the other developing eggs.
When you candle the eggs, you’ll likely see one of the following:
- A clear egg with no visible dark areas or lines. This egg is infertile or the embryo died very early. Remove this egg from the incubator.
- A ring of red. This means there was a chick that was developing, but it has died. Remove this from the incubator.
- Visible blood vessels. This means there is a live, developing chick. Blood vessels can be seen as early as 7 days. If you don’t see blood vessels (or you aren’t sure) when you check at day 7, you can check again at day 10.
What’s Going On in the Egg?
It doesn’t look like there’s a lot going on from the outside of the egg, but the eggs that you’re incubating are bustling with activity on the inside. In fact, your eggs will go from yolk and egg whites to a bouncing baby chick in just 21 days. If you’re curious about what’s going on, here’s a timeline to let you know what’s happening inside of your eggs:
Day 1- By the end of day 1, the chick’s nervous system, head and eyes have started to develop. There’s nothing to see yet, but those organs are already starting to form.
Day 2- Early in day 2 (around 25 hours in), the heart and the ear begin to form. By the end of day 2, the heart has started to beat.
Day 3- The nose, legs and wings are starting to form. You won’t see them for some time, but the development starts during day 3.
Day 4- The tongue starts to develop.
Day 5- This is a busy day! The permanent internal organs start to develop. The sex is differentiated today, meaning you’ve got either hens or roosters at this point! The aortic structure starts to form and thicken. In a couple of days, the arteries will be visible when candled.
Day 6- The beak starts to form today. It isn’t tough yet, but there’s soft tissues developing there.
Day 7- You should be able to see arteries today when you candle your eggs if the shells are lightly colored. A strong candling light will help illuminate them more clearly, especially if the shell is dark.
Day 8- The feathers start to form.
Day 10- The soft tissues of the beak start to harden.
Day 13- The scales and claws on the legs start to become visible.
Day 16- The scales, beak and claws are hardened and no longer made of soft tissue.
Day 17- The chick will position itself to hatch and turn it’s beak towards the air cell.
Day 19- The yolk starts to enter the body cavity, rather than remain on the outside of the chick’s body.
Day 20- By the end of Day 20, the yolk should be completely within the chick’s body.
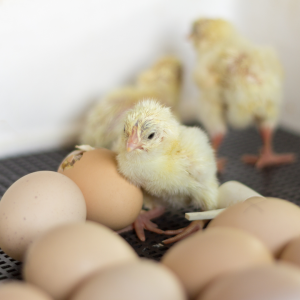
Day 21- Be prepared for your chick to hatch and enter the world!
Incubating chicks is such a fun and rewarding experience. There’s a lot that goes on in the short incubation period. If you haven’t hatched chicks before, now’s the perfect time!